Application Metrics
Performance metrics of applications hosted on Scalingo are gathered and accessible on the web dashboard. Just head to the Metrics tab of your application to see charts of these key metrics.
This page contains two main parts: application charts and containers charts. The viewing period is adjustable to 3h, 12h, 24h, 48h and 72h in the past.
Application Charts
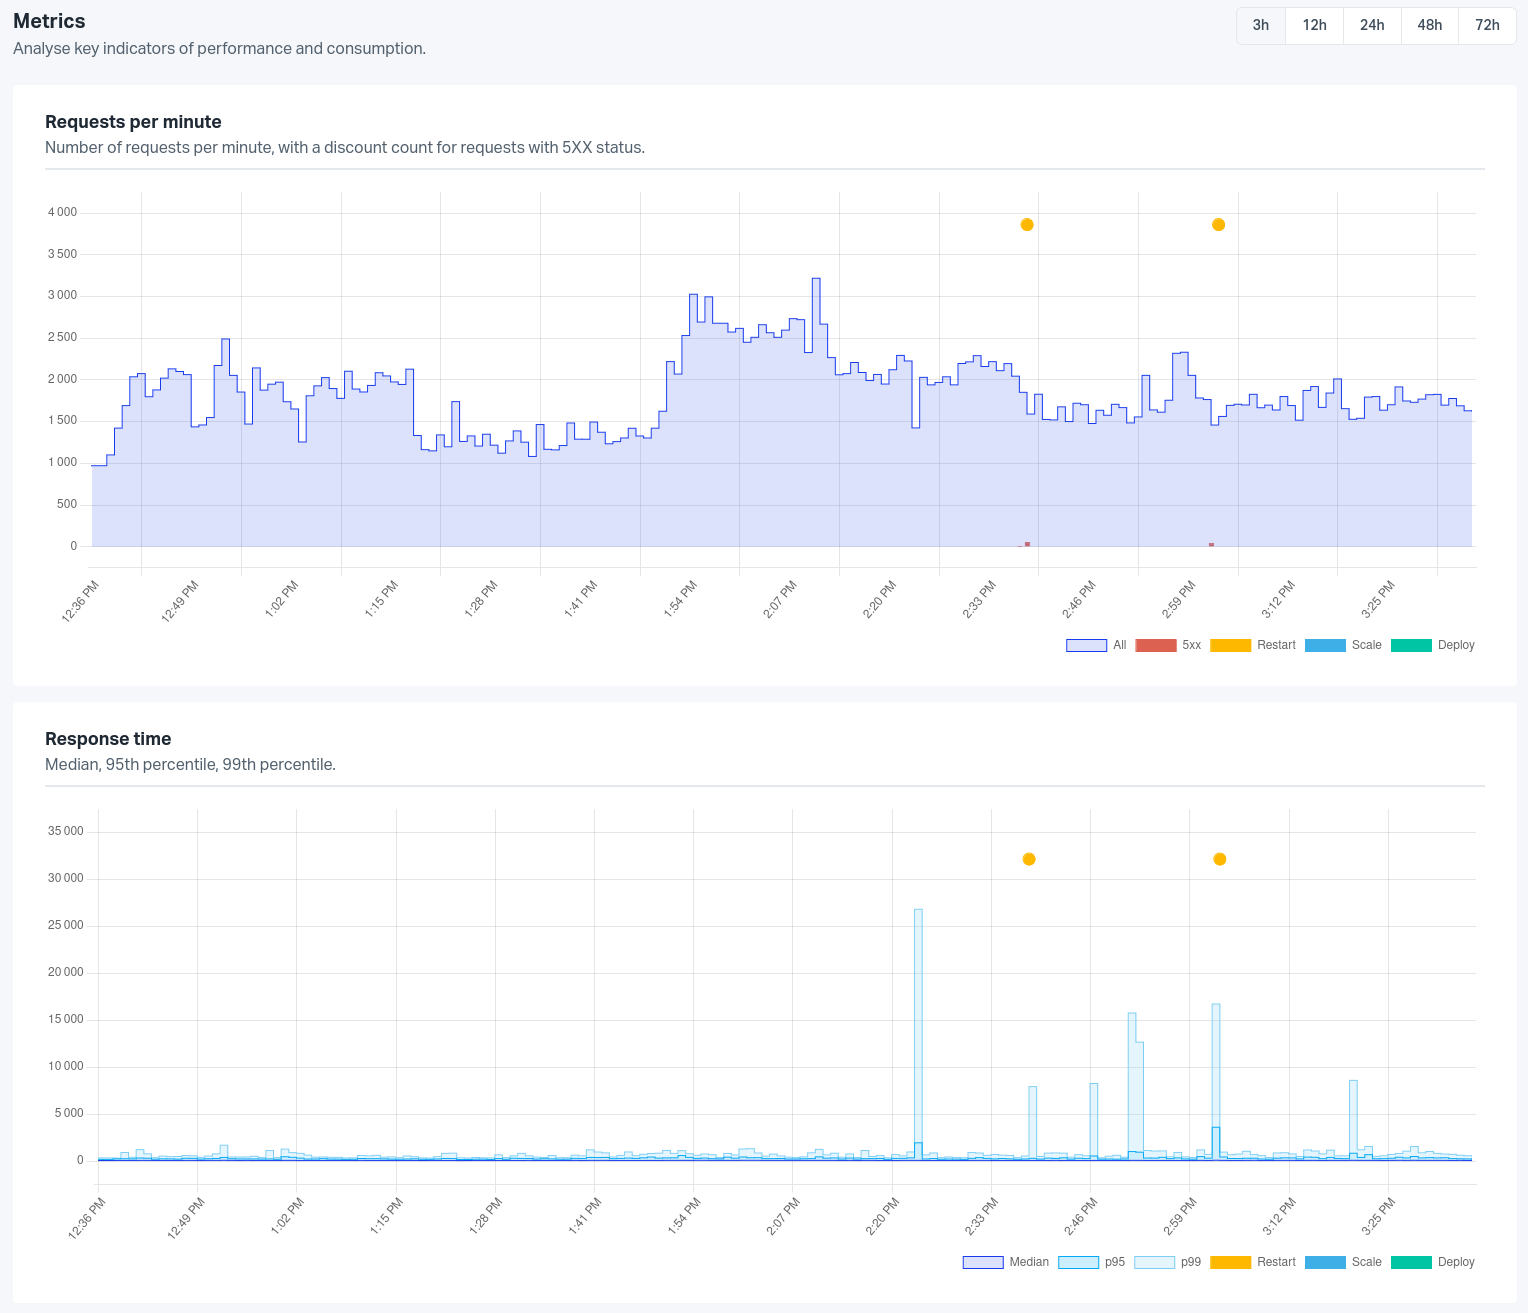
The application chart displays global data that are not container specific: events and routing metrics.
The Requests per minute chart show the number of requests the application receives per minute, the famous RPM. The number of server error responses generated by the application (HTTP responses in the 500 range) is displayed on the same chart as red bars.
Note: 504 and 503 errors can be generated by our reverse proxy. More information is available in the routing documentation.
On top of this chart, all the events that happened during the viewing period are displayed. This can help you link the application behaviour with events that happened on the platform, e.g. spot a deployment that contains a memory leak or follow your application behaviour after a scale operation.
A lot of events are available on the application timeline but only a few relevant are displayed on the metrics view:
- Restart event
- Deploy event
- Scale event
A complete list of events is available in the App Notifiers documentation.
The Response time represents the duration between the time a request arrives
at our front servers and the time our front servers receives a response from
your application. It also includes the websocket request times which can be long
request. The requests time chart displays 3 different values regarding the
requests time of an application: the 95th percentile (p95), the 99th
percentile (p99) and the median. All times are in millisecond. The median of
all your application requests times means that half the requests time are below
this value and half are above. The 95th percentile means that 95% of the
requests time are below this value and 5% are above.
Container Charts
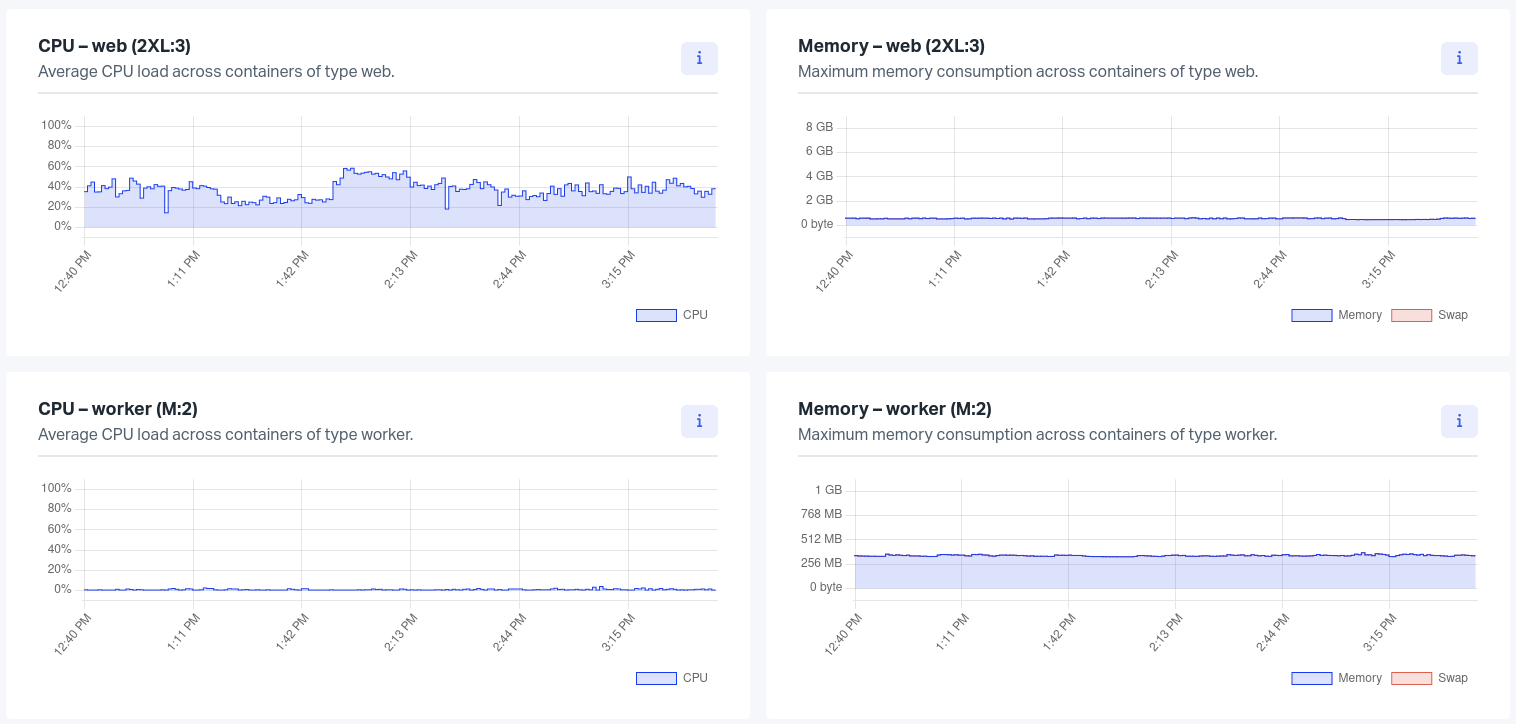
The container charts use the container types defined in your Procfile.
For each container type, two charts are shown. The first one shows the CPU usage and the second one the memory usage and swap usage of this type of container.
The CPU chart may exceed 100% if the application uses more than one core of the CPU.
For the memory chart, the memory (in blue) and swap usage (in red) are stacked. That way the total memory usage of the application can be monitored.
The swap usage can increase in two different situations:
- The application reaches its RAM limit. Swap then provides additional capacity for memory allocations. Once swap is disabled, this additional capacity will no longer be available and new allocations may result in an out-of-memory error.
- As a normal memory-management optimization, the kernel may move memory pages that have not been accessed for a long time to swap, even while RAM usage remains below the container limit. When the application accesses one of these pages again, the kernel moves it back to RAM, which may make that first access slower.
Note: The swap line is only shown if the swap usage exceeds 2% of the container memory limit.
If the application has more than one container of a specific type, these charts show the mean CPU usage / memory consumption of all containers of the same type.
Detailed View
If the application has more than one container of a type defined in its Procfile, a detailed view of all containers of a type is available. The charts are exactly the same except that they are per container (and not per container type). Use this view to check the memory headroom of each container during workload peaks. It can also help to spot a bugged container and therefore simplify the debugging process.